AlphaFold was a machine learning system from Google Deepmind. It did protein folding.
It was usably good at guessing protein structures. It caught public attention by doing really well in the Critical Assessment of Structure Prediction benchmarks.
AlphaFold did some useful work — mostly as an extra to help biologists predict a structure they were working on. A lot of biologists didn’t find it useful, some did. That’s fine.
I’m saying “was” and “did” about AlphaFold because Google killed it. [FT, archive]
The original founders of AlphaFold have mostly been reassigned over the past year. Google moved several of them to work on the Gemini chatbot. About a quarter left Google entirely.
Google moved Jumper to working on … fixing AI computer coding in Gemini. He left Google for Anthropic shortly after. A DeepMind employee told the FT that:
their departures had sparked surprise internally.
I’m shocked the Nobel-winning researcher wanted to do research, not product work.
Google’s real use case for AlphaFold was not the biology. It was to have a handy excuse for the excesses of the AI bubble.
Whenever chatbots are being garbage, some bozo will always say: what about medicine, huh? What about AlphaFold, huh?
Google was careful not to quite claim that AlphaFold would cure cancer. There’s laws about that. But they did talk about AlphaFold and cancer in the same press release blog posts a whole lot.
grind for a decade trying to help make superintelligence to cure cancer or whatever
Whenever an AI bozo says AI will cure cancer, they’re saying out loud what Google was trying to imply quietly. But even that hype no longer does enough work for Google to keep funding it.
What now? Google’s Isomorphic Labs is trying to commercialise AlphaFold output. The AlphaFold models and data continue to be developed at OpenFold, which is useful enough it’s attracted a pile of sponsors. [OpenFold]
But to Google, not even a Nobel Prize was worth keeping AlphaFold around. Yeah, we’re gonna put you on the chatbot, mate. That’s fine, right?
Suppose I’m asked first and I answer no. This tells you that I’m not holding the number 1, because if I were I’d know for certain that you held 2.
The interlocutor turns to you and asks whether you know my number. You say no. This tells me that you don’t hold 2, by the same principle — I know that you just inferred that I’m not holding 1, so if you held 2 you’d know that I must have 3.
And so on. Together we’ll work our way up the number line until one of us says yes.
McCall Weibel has finished both the Chicago and Salt Lake City marathons, but she has never run in a race against 60 horses. Ahead of her 40th birthday, she decided to remedy that. The Utah native flew to London and booked a three-hour Uber to a tiny town in mid-Wales, arriving £250 lighter to try her chances in Llanwrtyd Wells’s “Man v Horse marathon”. The gruelling contest takes runners, horses and riders across valleys and up 1,300m of elevation.
“I've never run with horses before,” says McCall, outside the town hall as she arrives to register for the race. “It'll definitely be a unique experience.”
Lining up alongside McCall are Robin and his two friends, who have driven across England and Wales after catching the ferry from the Hook of Holland to Harwich. Angela has travelled from Switzerland to mark her 50th birthday. Tony and Rob, from Liverpool's Penny Lane Striders, are attempting the race for the 19th time. Together, there are more than 700 runners signed up to test their two legs against four.
Barring a couple of barren Covid years, the race has been an annual fixture here since 1980. Llanwrtyd Wells, which bills itself as Britain's smallest town, has built a reputation on such eccentric pursuits. Every summer it hosts the World Bog Snorkelling Championships, in which competitors splash through a flooded peat bog. There is also the Real Ale Wobble, which sends half-cut mountain bike riders around forest trails.
On the weekend of the Man v Horse Marathon, the town swells from a population of about 800 to thousands, with barely a bed spare in the tiny mid-Wales outpost. Asked whether local traders appreciate the events, Stan, who runs the local corner shop, says: “All the traders do. We look forward to the events and the upturn."
Each of the quirky events traces its origins to one man: Gordon Green, a local who pioneered wacky competitions as a way to bring tourists into town to keep his ailing pub and hotel business alive. His ideas were also ripe for the attention economy, and the town has since monetised Britain’s love of the folksy and quirky with a burgeoning roster of off-kilter activities.
On top of the snorkelling and wobbling, in 2012 Green came up with the World Alternative Games — which featured finger jousting, hay bale tossing and wife carrying — when he noticed Wales was getting little upside out of the London Olympics. Speaking to the FT in 2023, he said: “We never bothered to ask the council to do anything because they didn’t have any money, and they didn’t seem to want to get involved in tourism. So, we tended to do everything ourselves.”
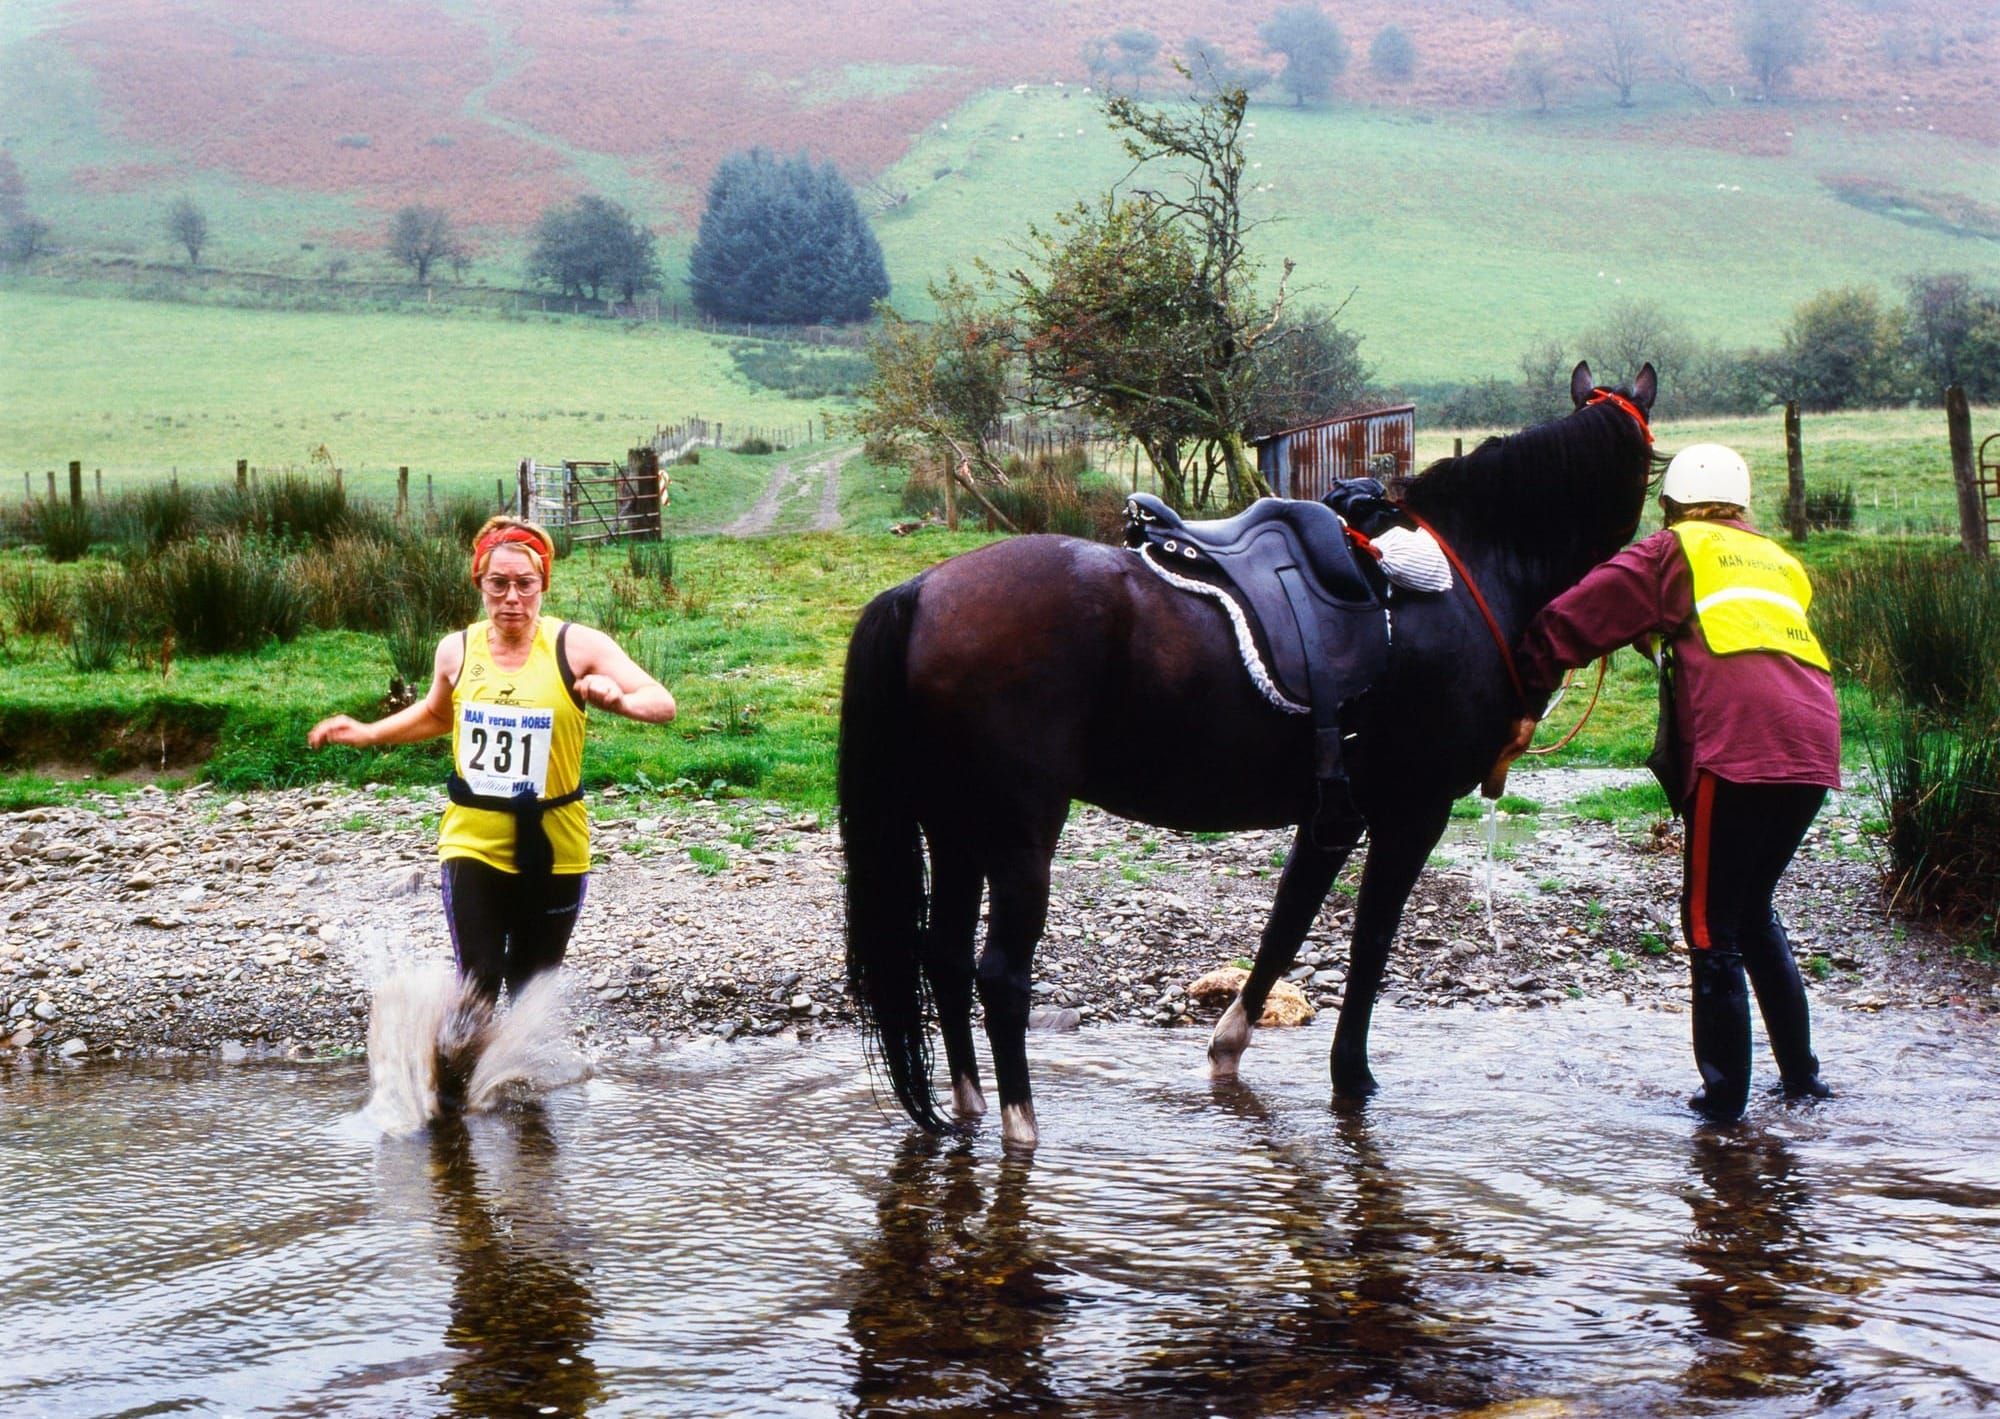
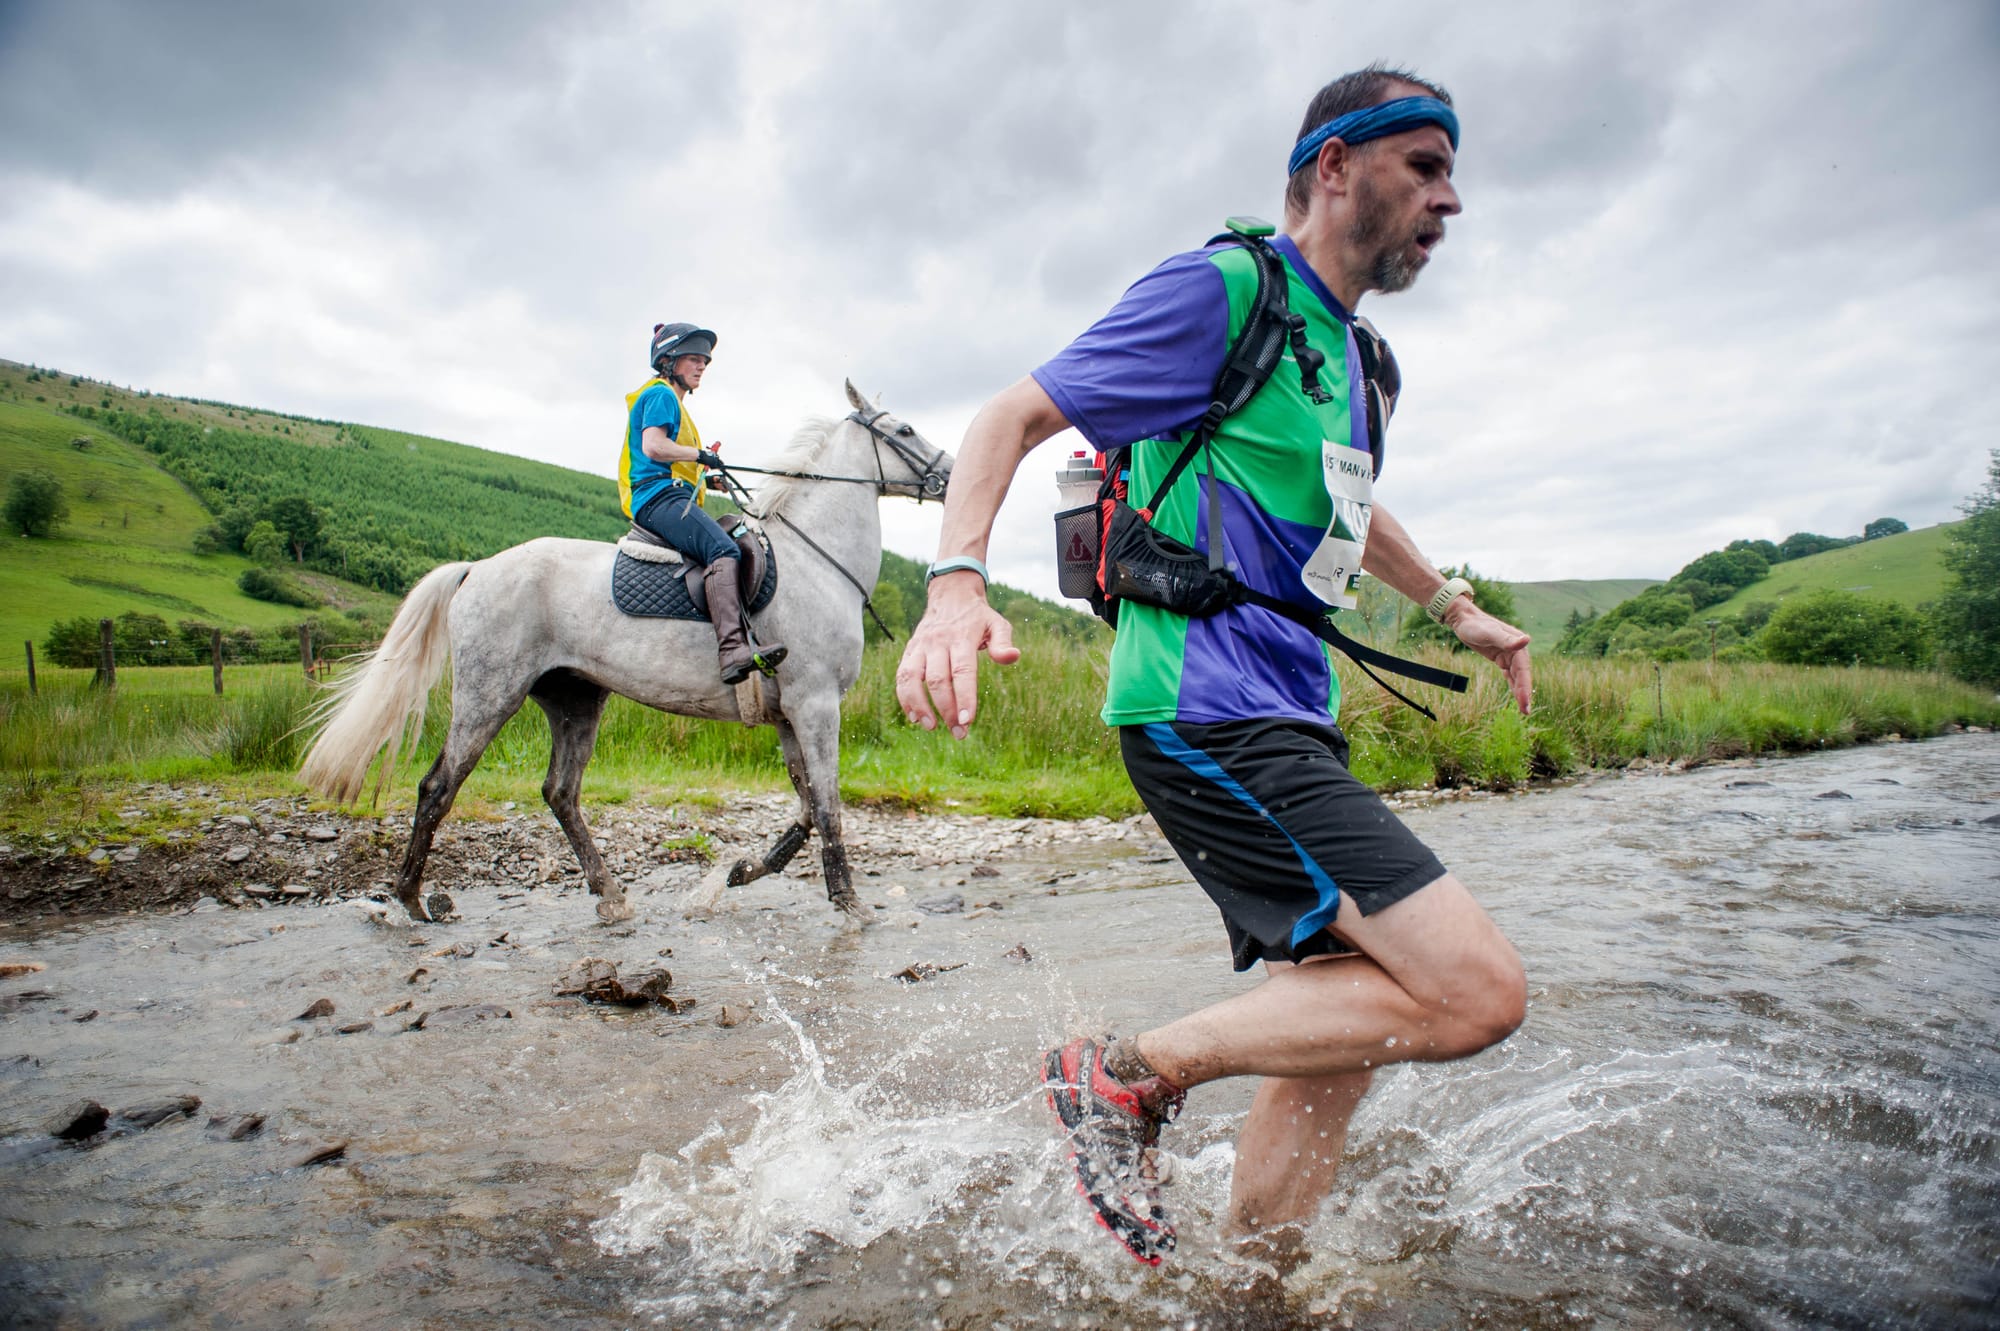
A man attempts to overtake a horse in a stream (Athena Picture Agency)
The marathon itself was founded in Green’s pub, The Neuadd Arms, which sits off the roundabout that makes up Llanwrtyd's town centre. The official story is that it began with an argument in the back bar. Glyn Jones, a local huntsman, insisted no human could ever beat a horse across rough Welsh terrain. Green disagreed.
The legend of the 18th-century Welsh athlete Guto Nyth Brân, who was reputed to be able to run so fast he could catch hares and foxes, also played a part. Green reckoned others might be able to live up to the stories told about Guto, so he put it to the test. If that brought tourist money into town, then all the better.
Horse beat man for the first 24 years of the competition, until Huw Lobb became the first athlete with two legs to win in 2004. He claimed a £25,000 prize, which had been rolling over since the race’s conception. Since then, four others have managed the feat, including three of the previous four editions.
You'll need to become a paid subscriber to read the rest of this article.
But here's some good news...
Our summer sale is live, making it the perfect time to join!
I teach public policy at the Harvard Kennedy School and the Munk School at the University of Toronto. And it will come as no surprise to you that my students regularly use AI to complete their writing assignments. Doing so is a waste of their tuition money. But if their entire career is going to include AI writing assistants, why shouldn’t they embrace their future?
The best way I’ve found to explain the dilemma comes from the AI researcher Daniel Meissler: it’s the difference between work and the gym.
At work, if your job is to move a bunch of heavy things from one side of the room to another, you should use whatever assistive tech you have on hand: a wagon, a forklift… even an AI-powered robot. But at the gym, it makes no sense for that robot to lift weights for you. The point of weightlifting isn’t to move heavy things across the room; it’s to actually lift those heavy things.
The same analysis holds for any task an AI can do for you. If it’s work—if the task has to be done and no one cares how—then it’s fine to use AI assistance. But if the task is more like the gym, and how the task is done is at least as important, then it probably doesn’t make sense to use AI.
This, of course, assumes that the AI is actually up for the task and that it’s trustworthy: that it can do the job well, that its mistakes are minimal and correctable, that it’s been secured from cyber-attacks that would influence its results. Those are all important, and shouldn’t be minimized. There’s no point giving an AI something that it can’t do reliably. But once you’re confident that the AI can perform the task, the work vs. gym distinction helps you decide if it should.
The writing assignments I give my students are gym tasks, not work tasks. I ask them to write policy memos not because the world needs more policy memos. I assign them because the very act of writing, which includes thinking and outlining and drafting and editing, making and criticizing and revising arguments, will help develop the critical thinking skills they will need in their future careers. And without this constant mental exercise, those skills will atrophy. Employers are already noticing.
Reading the assignments they turn in, I can see those skills either flourishing or atrophying in my students. At least today, I can pretty easily tell the difference between an AI-written memo and a student-written one—especially if the student just turns in what the chatbot produces. It’s a catchy, plausible, grammatically perfect essay that’s not particularly well-crafted or logically coherent—and with allthetells of mid-2026 AI-generated writing.
But it’s precisely because I have spent years developing my own writing skills that I’m able to identify prose that sounds great but doesn’t actually make sense. My students don’t have that skill; they mistakenly view a confident, well-written essay as evidence of the quality of their ideas. They see the AI as cleaning those ideas up, getting them through that uncomfortable stretch of having to turn those ideas into prose. What the students miss is that their initial discomfort is a normal and healthy stage of writing, and not something to quickly get beyond. The very act of struggling with how to express what they think is an important part of the process. It’s how they test out their ideas, examine their hypotheses, and actually figure out what they think. Homework is not work; it’s the gym.
Work vs. gym also helps us understand the problem facing creatives of all kinds.
Most of the time when someone hires a writer, they just need the words. They need an instruction manual for a piece of equipment, a detailed sales presentation, a government-mandated disclosure document, or a legal brief. They need dry, predictable, accurate writing: a piece of work, exactly what AIs are good at today and what I don’t want in my student assignments. Only sometimes is writing an art form—a book, a poem, an uplifting political speech. That kind of writing is more like the gym: process matters just as much as product.
For most of human history, the only option for all of these tasks was human writers. We hired one regardless of whether we needed work writing or gym writing. And that paid a lot of writers’ salaries. I know fiction writers who supported that poorly paying career with lucrative technical writing work. Now, for the first time in human history, we can separate out when we need writing as work and when we want writing as gym. And if AI can do most of the work-type writing, society doesn’t need as many human writers.
It’s the same for visual artists. Sometimes we need an actual artist, but most of the time we just need an image: a corporate mascot, a “beware of the dog” sign, or a packaging label. Historically we gave those jobs to artists, and sometimes beautiful art resulted. But most of the time it was just work. And, as it turns out, the world needs less pure art than simple images.
Explaining the problem isn’t the same as providing the solution. I give my students the “work versus gym” speech every class, but they still use AI. I have sympathy: assignments are hard, everyone is overworked and overstressed, and—most importantly—students feel like they’ll look bad in comparison if their peers are all using AI. Even if they don’t want to use the technology, they feel like they have no choice.
There’s also an incentive problem. No one pays us to go to the gym; maintaining healthy habits requires discipline. For me, the payoffs to exercise—fewer aches and pains, less fatigue, better mood/stress management—might make me a better writer and teacher, but they’re subtle and easy to miss. For my students, incremental improvements in their reasoning and writing are equally subtle.
We do have a choice. We can look at the tasks of our lives and separate them into work or gym. Just as we might choose to use the stairs instead of the elevator, or walk instead of calling an Uber, we can wall off our cognitive gym tasks from AI and ensure that we don’t lose our skills to this technology. And we can do the same when we assign a job to someone else. If it’s a work task, we can have AI do it. If it’s a gym task, it’s a waste of everyone’s time to give it to an AI because no one learns or gets stronger as a result.
Similarly, a future where AI generates words and images is one where society has to make choices about how it will treat its creatives. This won’t be the first time—today there is minimal demand for portrait painters, for example—but maybe this time we can make different, more deliberate, choices about the value of art in our society.
AI is going to fundamentally change the nature of work. Not nearly as fast as the AI companies want you to believe, but eventually it will. Policy analysis will definitely involve AI from now on, and my students need to reimagine what it means to learn and practice that skill. More generally, the line between work and gym will change in the future as we humans adapt ourselves to a world with these new intelligences.
But for now, the work vs. gym distinction is pretty clear. Use it on yourself.
Chalkbeat Ideas is a new section featuring reported columns on the big ideas and debates shaping American schools. Sign up for the Ideas newsletter to follow our work.
There was no single reason why Ryan Higgins decided to leave teaching.
It was a job he loved: invigorating, unpredictable, a chance to make the world a bit better. But several years into his career, Higgins, who taught high school social studies in the Fort Worth, Texas area, was increasingly frustrated.
For one, his salary — decent when he was fresh out of college in 2016 — felt stagnant and mediocre. He coached basketball and football, so his days often stretched from early morning to late evening. And “teacher appreciation week” began to feel borderline demeaning: You can wear jeans all week! There’s free pizza in the teachers’ lounge!
Then there was the time a parent complained after he chewed out and benched a member of the basketball team who was slacking off. The school’s assistant principal didn’t back Higgins up. Yes, maybe he had been a bit too tough, but he was also giving up his Saturdays, doing students’ laundry, and even driving the bus.
Ryan Higgins, during his teaching days, with a colleague.
“You’re running around like crazy trying to solve problems, and yet people who aren’t with you are always telling you what you need to do better,” Higgins says.
What finally pushed him out was the aftermath of the pandemic. Trying to effectively teach students over Zoom was all but impossible. Then when students returned to classrooms, they were breathtakingly behind academically and socially. Behavior was out of control. Parents, it seemed, were less trusting of teachers, too. “It felt like the walls were closing in,” he says.
Higgins left teaching in the summer of 2022. A member of the Army Reserve, he soon took an assignment overseas. Today, he’s going into his third year of law school. He sees himself as part of a “lost generation” of teachers.
The year Higgins left, more teachers departed public school classrooms in Texas than at any point since at least 2007, the earliest year with state data. This was not just a blip: From 2020 to 2025, the state lost 35,000 teachers who would have stayed in the classroom if the state had maintained its pre-pandemic turnover figures. That’s equivalent to nearly 10% of the current teacher workforce.
The pattern in Texas has repeated to varying degrees in states across the country, according to an extensive Chalkbeat analysis of data since 2019 spanning 21 states. Most of those states have experienced four to five straight years of elevated teacher turnover, compounding the losses year after year. High-poverty schools in particular were already having a hard time keeping teachers.
There is no comprehensive national data on teacher exit rates. To fill this gap, I conducted an extensive state-by-state review, using a variety of sources.
Across most states, a pattern emerged: Compared with 2019, fewer teachers left the profession in the summer of 2020 when the economy was at a standstill due to the pandemic. But then teacher attrition began to rise sharply. Rates peaked in 2022 but typically remained elevated for the next couple years.
Only a couple of states in this analysis, Connecticut and Maryland, avoided any meaningful rise in turnover.
A spokesperson for the Texas Education Agency said the state has “experienced many of the workforce challenges seen nationwide, which is why teacher recruitment and retention remain a priority.” Texas, for instance, has expanded a merit pay program, which has helped retain effective teachers, according to a recent study.
High-poverty schools, which struggled with teacher churn before the pandemic, likely suffered the most from the turnover spike. In South Carolina, for instance, exit rates rose especially sharply at those schools. A number of states have reported increases in uncertified, emergency-certified, and inexperienced educators. Those teachers are typically concentrated in high-poverty schools.
It hasn’t just been teachers departing. In Alaska, North Carolina, Massachusetts, Texas, and Washington state principal attrition rose too. Turnover often has a cascading effect in schools. When a principal leaves, an assistant principal may take over, a teacher may become an assistant principal — and another classroom vacancy opens up.
Justin Wax became principal of a junior high school in southeast Louisiana in 2021. He was the third leader in three years. That made keeping staff harder since many were looking for stability at that moment. Most of the teachers who were at the school when he started are now gone. “You’re scraping the cream off of the top of all of the most veteran people,” Wax says. “There ends up being a vacuum.”
Turnover appears to be finally coming back down. In the 12 states with figures through last summer, rates were below post-pandemic highs, although some places have not fully returned to pre-pandemic levels.
Wax says he’s had his best year of retention recently and is well staffed going into this coming school year. He’s prioritized making his school a supportive community where teachers are given professional autonomy and backed up on student discipline issues. Today, surveys show that teacher stress has subsided from pandemic-era spikes. Most teachers are at least somewhat satisfied with their jobs.
More comprehensive recent data on turnover is not available because many states report figures with a significant lag. Other states don’t report numbers at all. And no state appears to have data yet for the share of teachers who have left this summer.
Teachers face worse behavior, stagnant pay, fewer perks
What drove the sharp increase in teacher exits?
Meghann Seril has been teaching elementary school in Los Angeles for 18 years. These days, she finds students’ behavior more challenging and their attention spans more limited. She’s seen many colleagues who struggled with classroom management leave in recent years.
“It has such a ripple effect because the administrator is focused on supporting those new teachers,” she says. “You’re working on putting out little fires all of the time.” In surveys, teachers often say that student behavior is their top source of stress, and many reported that behavioral issues spiked after school buildings reopened.
Meanwhile, many other professionals have received a valuable new perk since the pandemic: the ability to work from home. “Being a teacher is arguably the least flexible job around,” says Alex Baron, principal of a charter middle school in Washington, D.C. He suspects that’s made it difficult to recruit and retain teachers in his school.
At the same time, teacher salaries, never particularly high, have fallen in real dollars, as inflation soared and school officials used new funds to hire more staff rather than give teachers a raise. The salary gap between teachers and other college-educated professionals has grown in recent years.
Tyra Damm’s decision to leave teaching came down to money. Some of her colleagues with higher-earning spouses saw teaching as a nice-to-have second income. One called it “fun money.” Damm, who lives in the Dallas suburbs, did not have that luxury. She took up teaching in 2013, soon after her husband died of brain cancer. She figured it would provide a stable income with a parent-friendly schedule as she raised two young children.
She loved the job. Damm most recently taught middle school reading and writing to gifted and talented students and was named secondary teacher of the year in her district in 2019. But with only anemic raises and the price of everything rising, “I just couldn’t pay the bills anymore,” she says.
When the American Heart Association, which she had done freelance writing for, offered her a full-time job with remote work and higher pay,Damm felt like she had no choice but to take it.She left teaching in 2024.
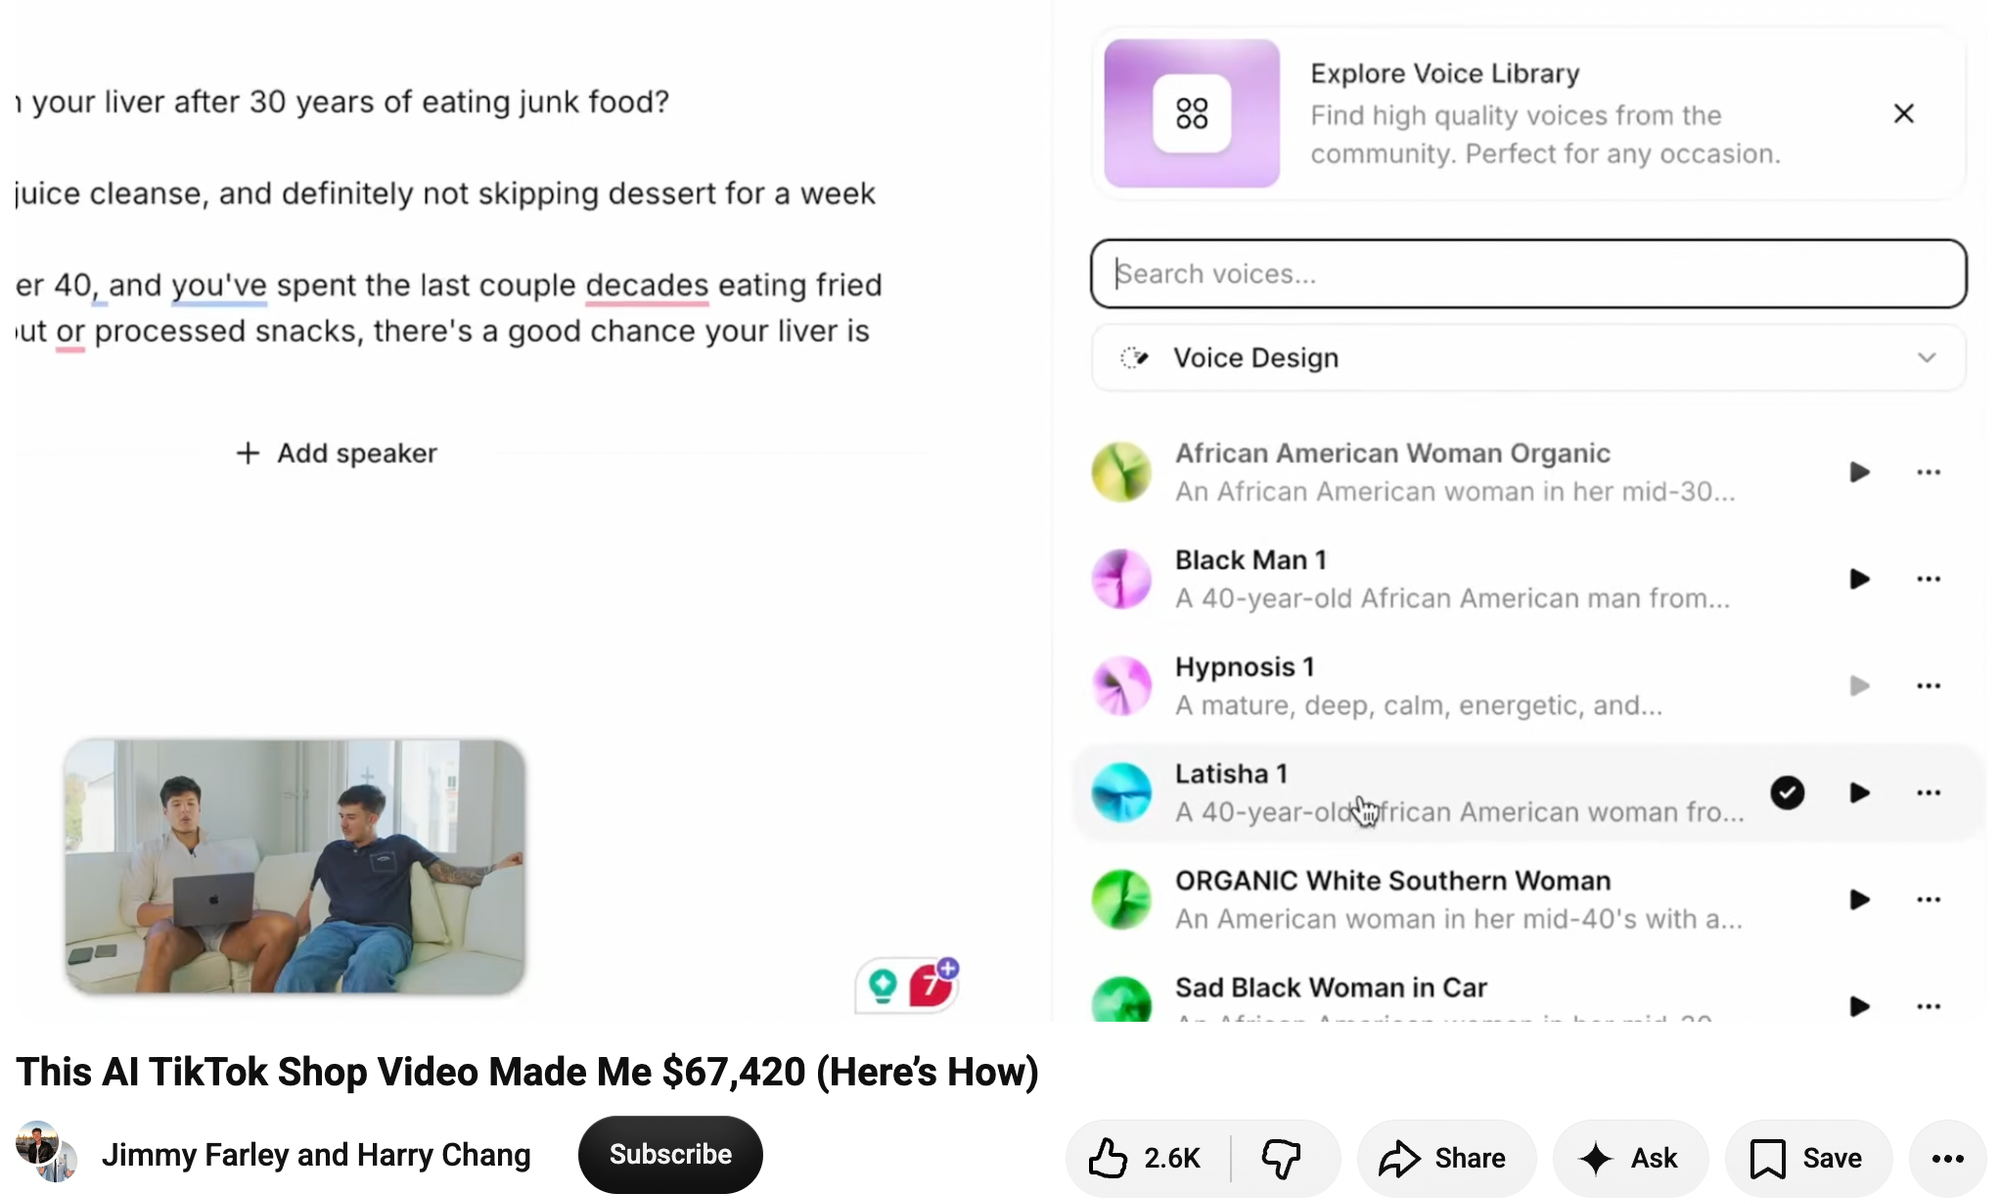
In February, a content creator from New Zealand named Harry Chang posted a YouTube video called “This AI TikTok Shop Video Made Me $67,420 (Here’s How).” In the video, Chang and another YouTuber, Jimmy Farley, describe how Chang created a viral marketing video for a supplement company called Rosabella called the “Nigerian SECRET to CLEAN LIVER!!”
Chang explains that he copy-pasted the script from a video posted by an account called “liverboosthub11” and tweaked it to suggest the supplement he was marketing is “something that’s been used in Asia or Africa for a long time that a lot of people don’t know about in America.”. In Google’s VEO 3, he created an AI-generated Black woman wearing a surgical mask in the foreground of the video, pointing up at another AI-generated Black woman (created in a tool called HeyGen) wearing a pink dress and standing on a stage. He directed the woman in the foreground to have a “strong African American accent,” and to say, “Why is nobody talking about what this hoe said?! If you’ve got issues with that belly, must watch!”
“Builds curiosity, builds intrigue,” Chang says about his creation. “People want to know, ‘damn, what did she say? What did that ho say?’” To make the AI-generated woman on stage read the script he took from liverboosthub11, he pulls up the popular AI voice generator ElevenLabs. He scrolls through a list of voices that he had created, including “African American Woman Organic,” “Black Man 1,” “ORGANIC White Southern Woman,” and “Sad Black Woman in Car.” He settles on a voice called “Latisha 1.” He syncs the voice with the AI-generated videos he created in the video editing software CapCut. This AI video goes on to get 1.3 million views on TikTok and apparently earned him tens of thousands of dollars in affiliate sales.
In another video, Chang explains how he has made tens of thousands of dollars using AI influencers. “I’ve even had my clients buy me Rolexes for selling so much of their products,” he says.
A new lawsuit argues that the strategy is, indeed, illegal. (After 404 Media asked for comment for this story, several of the YouTube videos mentioned in this article were deleted).
In February, a supplement company called Humann sued a competitor called Ambrosia Brands because Ambrosia, through the supplement company called Rosabella, allegedly directed and influenced the creation of hundreds of TikTok Shop videos and ads featuring AI-generated “doctors” that oversold the supposed benefits of Rosabella’s products. Rosabella’s AI marketing practices have previously been written about by 404 Media and The New York Times, but were most thoroughly explored in an excellent episode of the podcast Conspirituality.
The lawsuit reveals new details about how this group of 20-something YouTubers built their army of AI-generated influencers. In practice, Rosabella is more of a social media AI content hustle and AI marketing exercise than a supplement company. What happened in this case is the same type of spam and buy-my-course to get-rich-quick strategy that we have repeatedly written about, only this time the slop is being used to shill supplements largely to the elderly. Rather than payouts coming from the number of views a video gets on social media, the payouts are commissions on products sold. The lawsuit was spotted by the lawyer Rob Freund on X.
“All these guys are ex-dropshipping guys,” Mallory DeMille, who studies the wellness and supplements industry and who reported the episode of Conspirituality, told 404 Media. “They could have chosen anything to sell to make AI content out of, but they chose supplements, and it’s interesting they chose supplements because it’s such an unregulated market where [they] can basically pump out whatever product they wanted to with very little oversight. On the marketing side, it’s also pretty unregulated and there’s a lot of real [human] influencers making unfounded health claims without there being many consequences. In terms of ease of making money — wellness, they chose this industry for a reason. I think it’s pretty seamless, has proven to be seamless and now they’ve sold a fuckton because of how easy it is.”
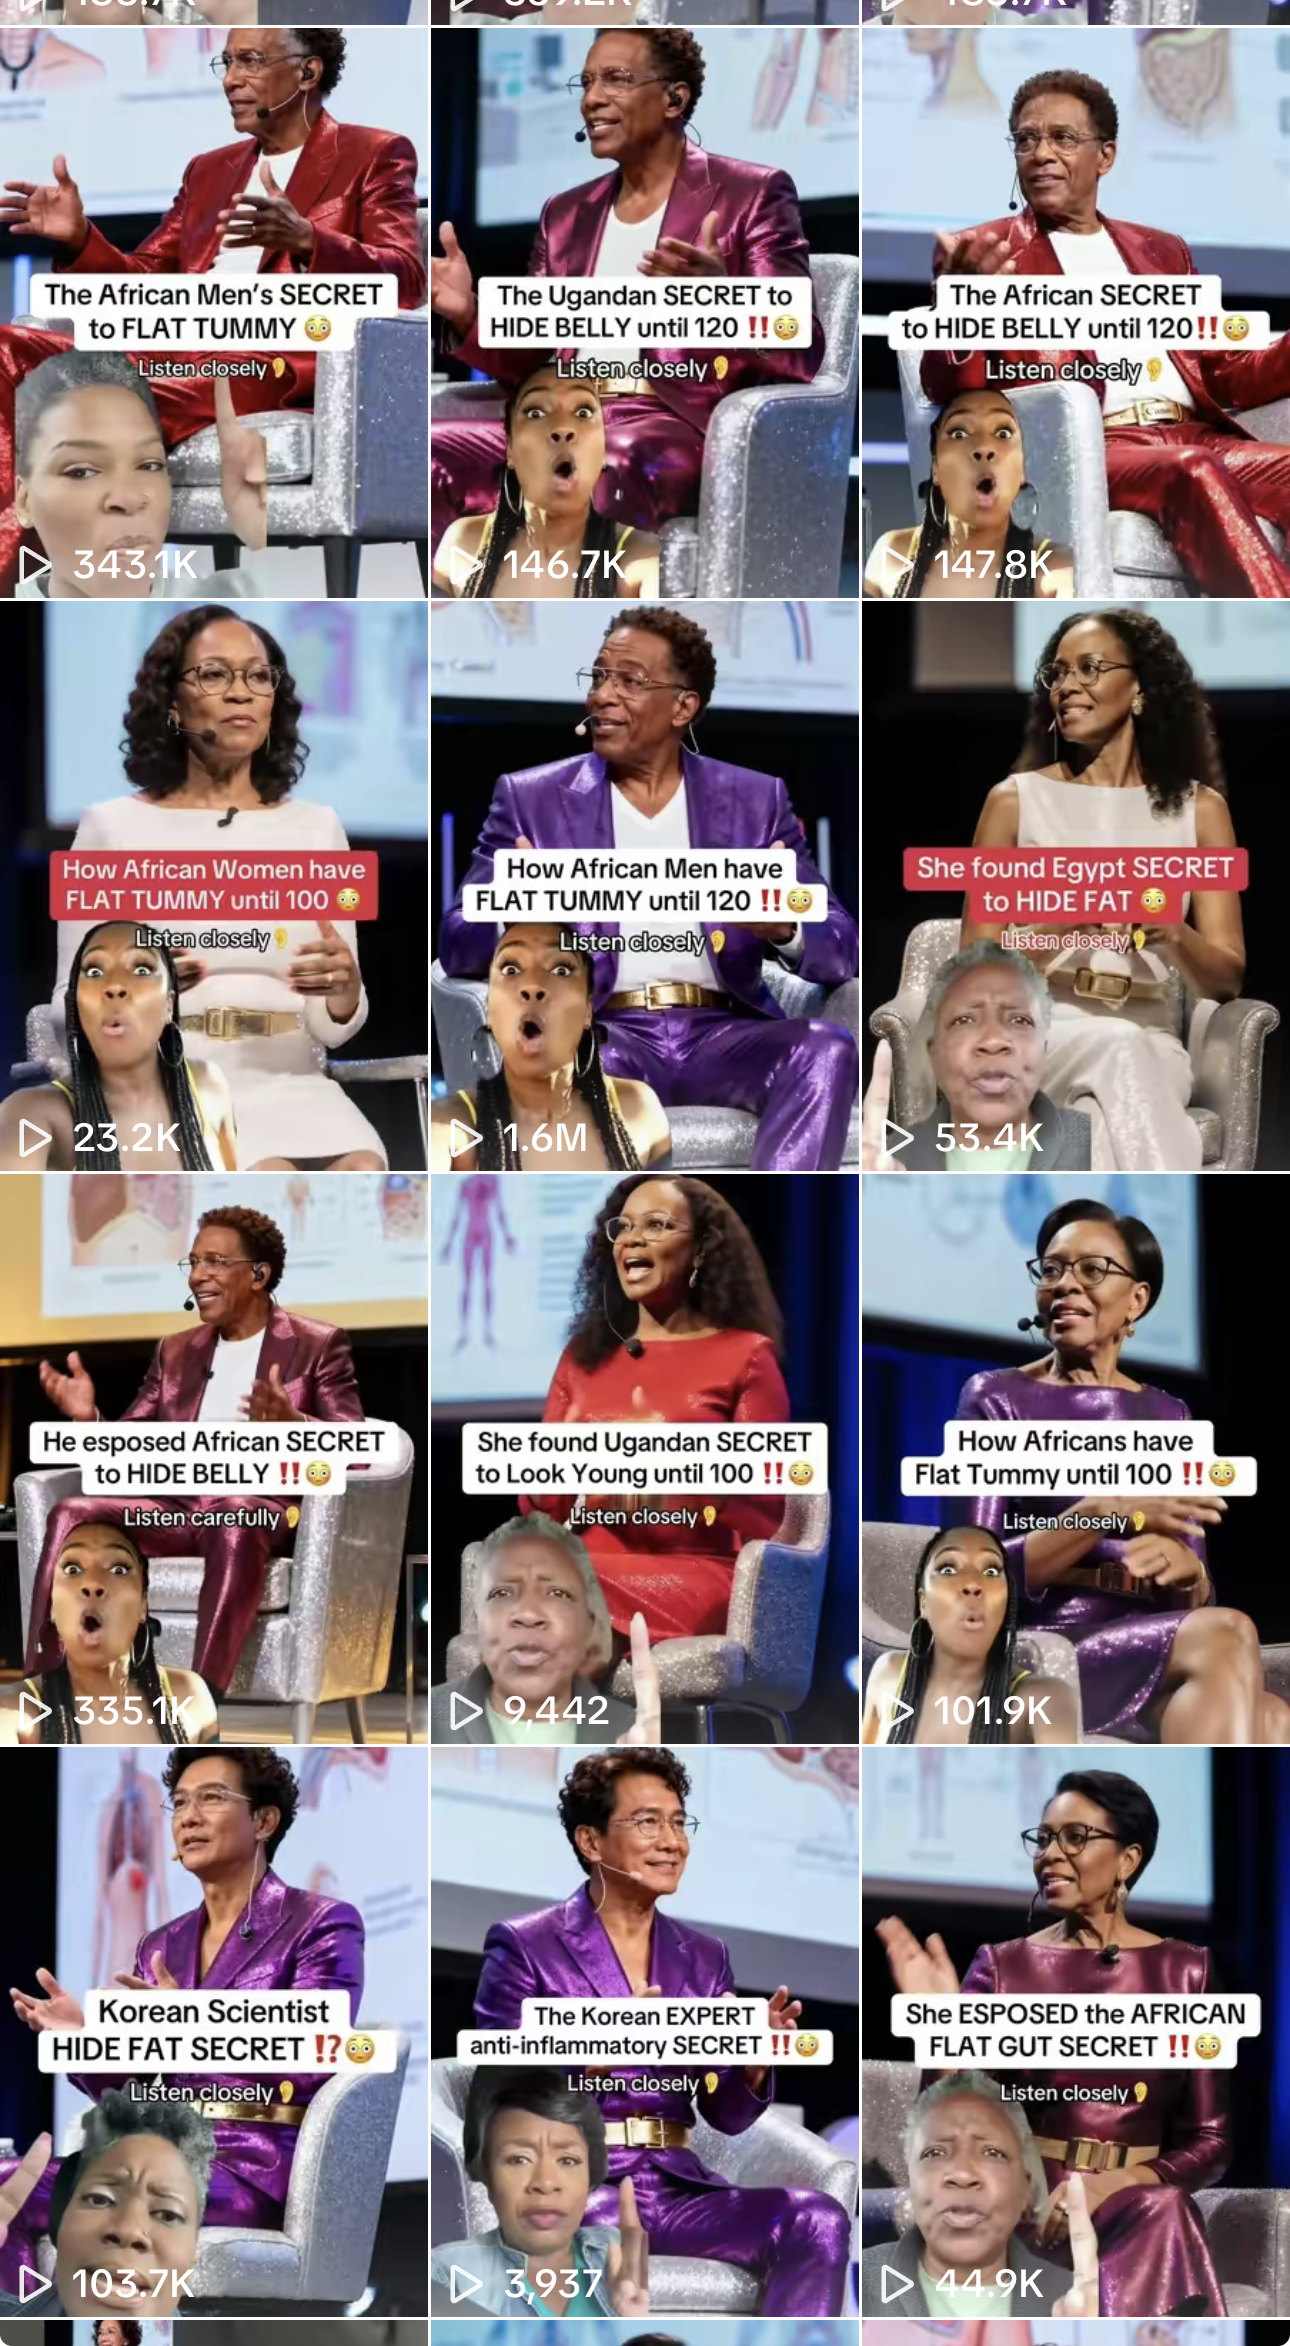
The lawsuit highlights a series of TikTok videos—like the ones I described above, and most of which are still online—featuring AI-generated doctors, TED Talk-style speakers, and videos that are essentially identical to the ones Chang has repeatedly taught people on YouTube how to make. And hundreds of additional videos promoting Rosabella that are not highlighted in the lawsuit are trivial to find on TikTok. Many of them have hundreds of thousands or millions of views and seem to make wild promises about what Rosabella supplements can do.
In another video, Chang explains why his favorite products to sell fall into the “elderly health” category: “It’s an extremely profitable niche, especially in the U.S., guys.”
“In the U.S., they have very high demand for health products,” he says. “They don’t have any free healthcare, right? People over 35 literally are very concerned about their health […] You have moms who buy 100 supplements and put them all in their cupboard. It is crazy. It’s crazy.”
“When you have such a high, problem-solving niche, it’s very easy to write scripts for, very easy to innovate, and just continuously make money,” he says, adding that he usually generates AI influencers who themselves look old.
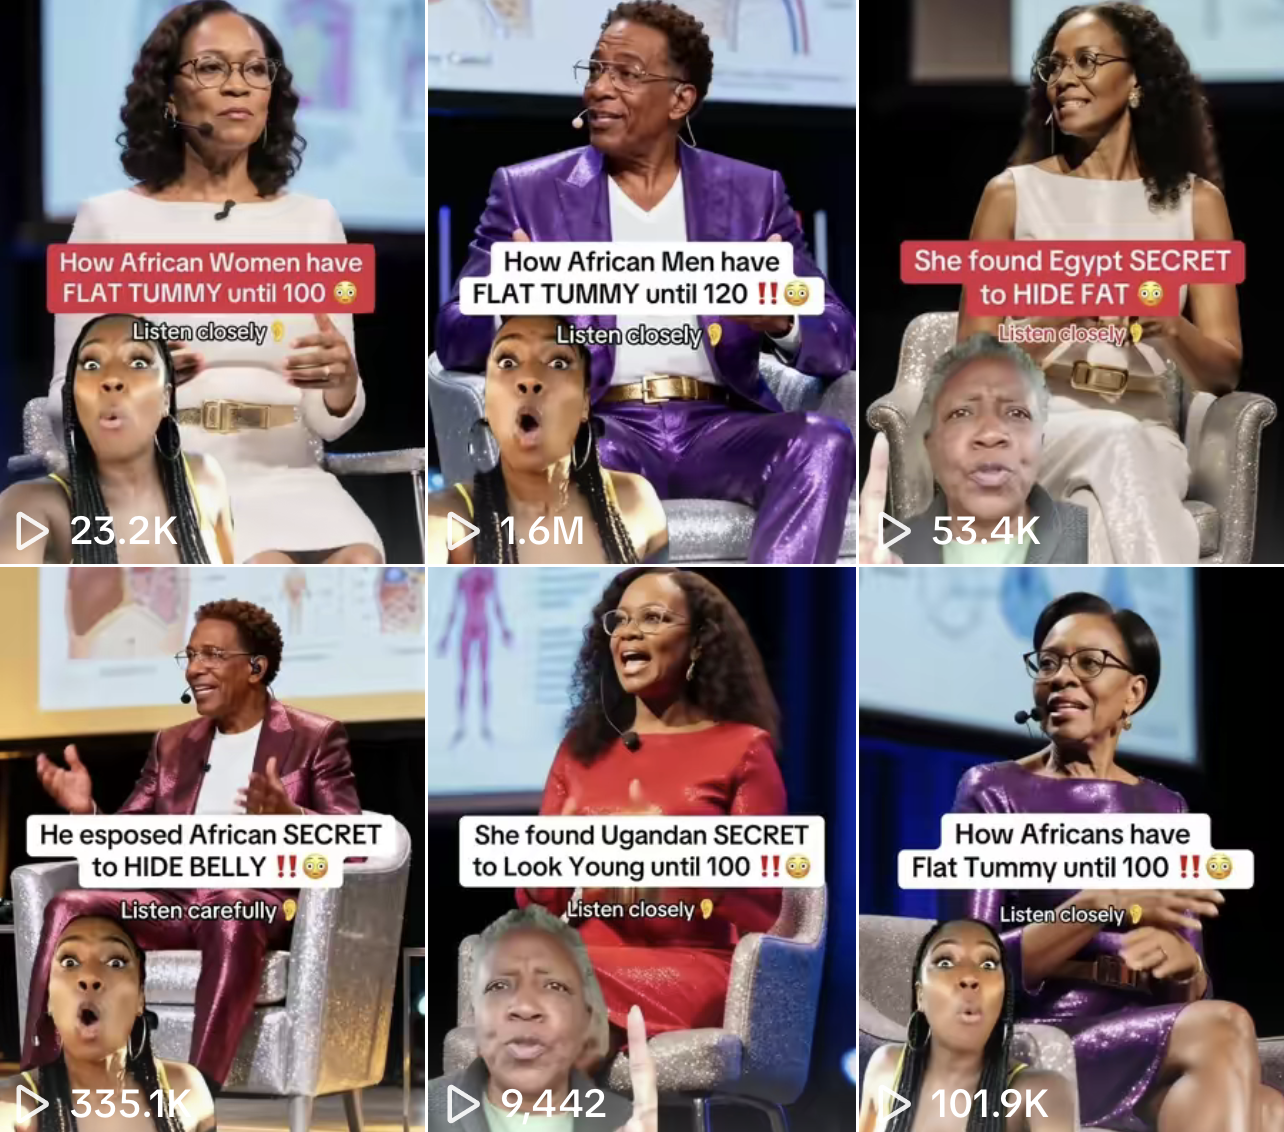
“They’re relatable and credible,” he says of three older-looking AI people he shows on screen, one of which is shilling beetroot powder from Rosabella. “Why? Because they are old. People are more willing to listen to old people only because they see them as more wise and intelligent […] and look how credible they look. They’re speaking on stage like TED Talk-type style and they’re more relatable because they’re more similar to the age we want to target. If you’re trying to sell health products to a 50-year-old, well, make your avatar 50 years old.”
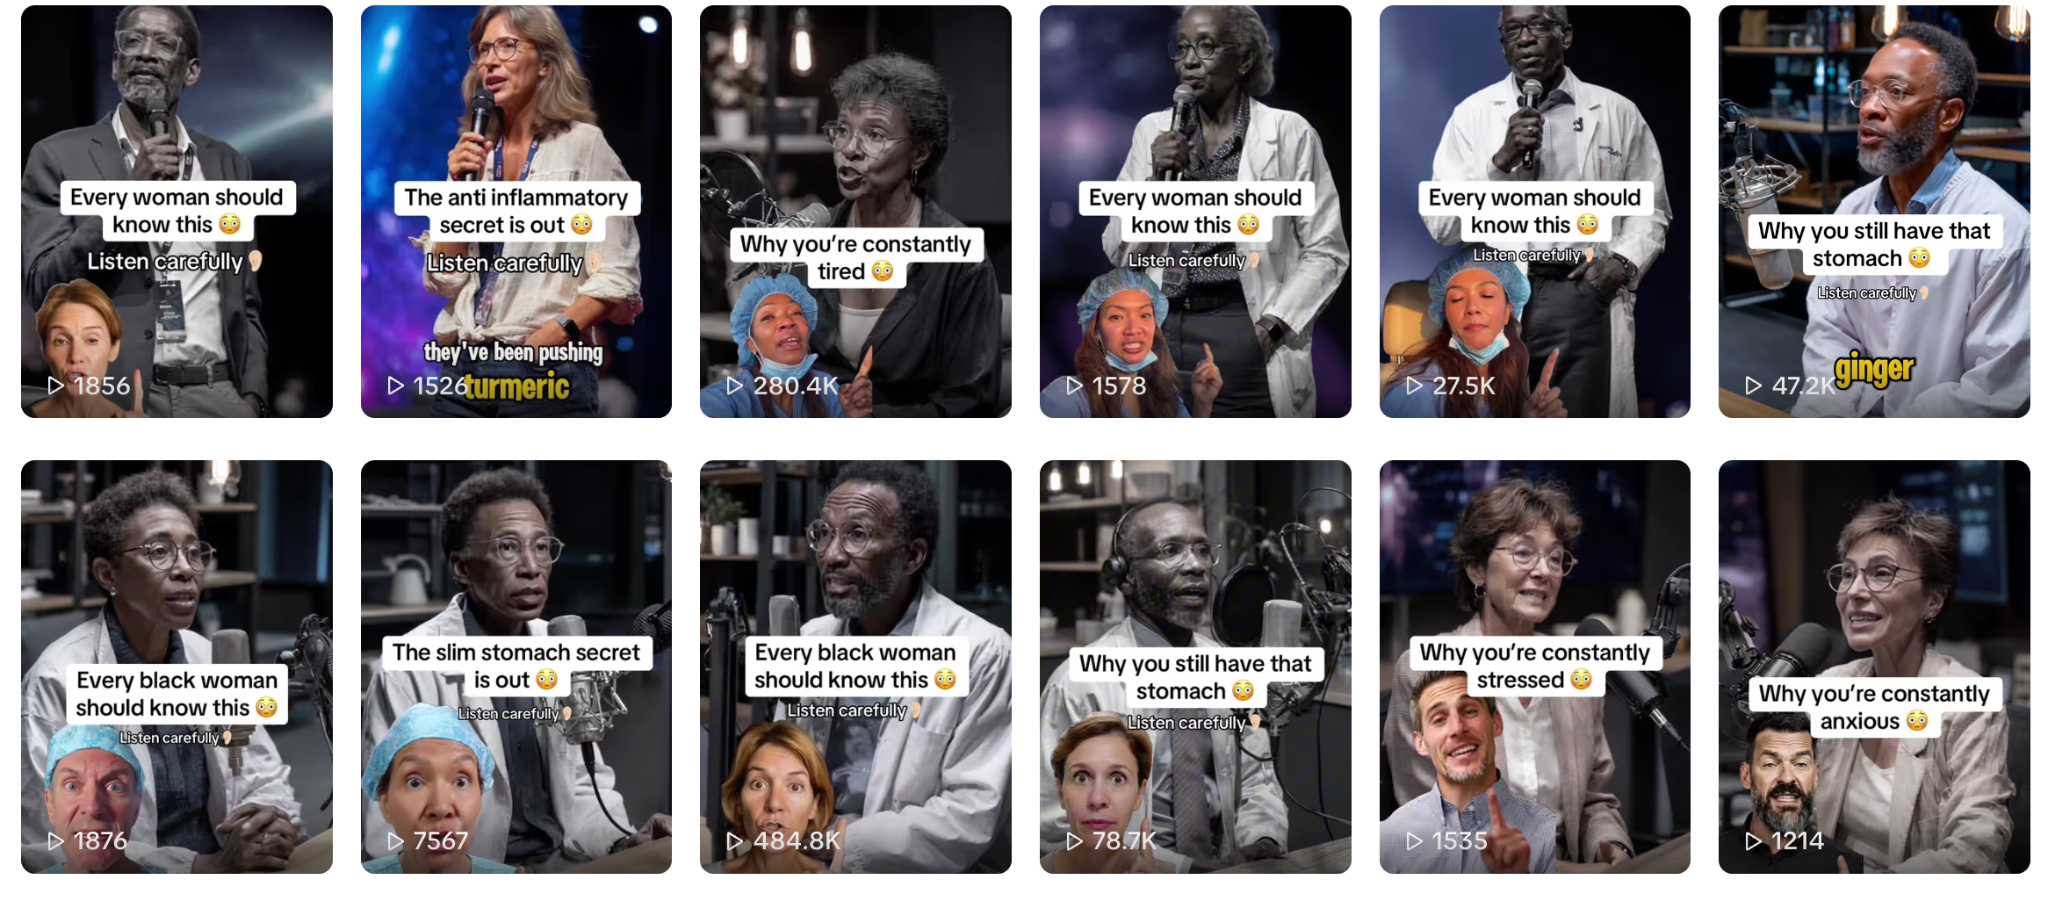
On TikTok, Rosabella used a mix of paid influencers and AI-generated characters to make unfounded medical claims about its products and about beetroot more generally, the lawsuit alleges. “In several TikTok Posts, the post purports to show a doctor, medical professional, or other medical authority espousing the health benefits of Defendant’s products. All or nearly all of the ‘doctors’ featured in the TikTok Posts are AI-generated and fictitious, making the claims in the advertisement false and/or misleading,” the lawsuit notes. “For example, in a June 14, 2025 TikTok post, influencer ‘poormaninla’ purports to depict a doctor in a whitecoat that promotes the alleged health benefits of Defendant’s products. Before the ‘doctor’ begins speaking, a separate speaker is imposed on the screen in a surgeon’s or nurse’s scrubs.”
The “poormaninla” account is still up on TikTok and its videos are almost entirely AI-generated. Several of the videos have hundreds of thousands of views. “The best food for Black women to eat if they want a slim stomach is not turmeric, it’s not ginger, and it’s definitely not blueberries. Just one teaspoon of this food reduces gut inflammation,” an AI-generated man in a lab coat says in one.
You can see some of the videos promoting Rosabella here:
The lawsuit argues that Rosabella is “orchestrating a misinformation campaign on TikTok through its network of influencers,” who “make various misrepresentations about the health and wellness benefits of Defendant’s beetroot products, which are entirely unfounded.” The lawsuit alleges that Rosabella, through a private Discord channel, offered extensive coaching to content creators on how to make AI-generated TikTok ads; that many of these ads featured fake doctors and other AI-generated people who were made to look authoritative; that some of these videos were racist; and that when people bought Rosabella products through TikTok Shop links on those videos, the creator of those videos would earn a commission. Humann’s argument is that Rosabella’s “false and misleading representations undermine public confidence in other beet products, like Humann’s SUPERBEETS products.”
Ambrosia says, essentially, there is no evidence it told people what to do in the Discord channel. In court filings, Ambrosia claims that Humann “fails to allege any facts that plausibly show Ambrosia induced or materially contributed to the third-party conduct it complains of.” It remains unclear whether what Rosabella was doing is illegal in the unregulated world of supplements in the U.S., or whether a competitor could win a false advertising lawsuit like this. But there is no doubt about Rosabella’s strategy, what their motivations are, and the incredibly close connection between Rosabella and the network of content creators who made, conservatively, hundreds of AI-generated videos.
The lawsuit highlights how common fully AI-generated marketing has become on platforms like Instagram and TikTok, and nods at, but does not dive into, the complicated web of YouTube hustlebros that have largely given rise to this practice, and the social media platforms that have incentivized and promoted AI-generated spam and fly-by-night supplement companies. Rosabella is a company that has already been subject to an “extensively drug-resistant salmonella” recall by the Food and Drug Administration. But it is maybe better understood not so much as a supplement company but more as a branding exercise and vertical video content hustle by the same types of AI spammers and buy-my-course bros we’ve written about numerous times over the last few years.
In a video about “why you need to be working with Rosabella” qposted by an account called “Luca Washenko” on the online course sales platform Whop, a man brags “we paid out over $400,000 last month to creators.” He says that individual people have made more than $300,000, and shows “proof and dates of our creators getting tons of views consistently. Got 55 million right there […] I am one of the lead coaches in the Rosabella server.”
But Washenko isn’t just a creator helping to advertise Rosabella. He is the company’s founder. A YouTube video repeatedly alludes to this, and mentions how much money he and his army of affiliate creators have made selling Rosabella products on TikTok Shop. Washenko is also listed as the cofounder of Rosabella on several trademark filings I found, and his LinkedIn lists him as the founder of “MNY Ventures,” a company that has the Rosabella logo on LinkedIn. Clicking through “MNY Ventures” goes to a LinkedIn page for “Rosabella,” which has several job listings for AI video editors: “MNY Ventures is home to one of the fastest-growing supplement brands in the world, built on the back of a high-performance, results-obsessed culture. We don't just create ads; we create market-leading campaigns that generate massive revenue,” one of the LinkedIn job listings reads. “Your mission is to lead the production of our high-converting AI videos quickly and at high quality. You will be responsible for consistently creating on-brand and compliant video content based on proven formulas designed to maximize reach, ensuring MNY Ventures maintains its position as the #1 leader in AI video marketing for e-commerce.” The listing adds the person will need to produce “10 high-quality AI videos per day, following our preset scripts and styles.”
In a video called “Inside a TikTok Shop Meetup with Million Dollar Creators,” there is no doubt about Rosabella’s strategy, Washenko’s motivations, or Rosabella’s close relationships with the people spamming AI-generated content shilling its products. Rosabella is just the latest of Washenko’s creations. His previous claim-to-fame was selling caffeine vapes on TikTok.
“There have been creators that are now millionaires from working with Rosabella,” Washenko says in the meetup video. “It’s one thing if you make money, it’s another thing if you can help everybody around you make money. An event like this where you can go face-to-face and shake hands with people and they say, ‘You’ve changed my life.’ And I’m like ‘You’ve changed mine.’ Those are the moments that are so special, especially when everything is remote. It’s online. It’s Discord, that’s one thing. You look them in the eye and they say, ‘I was able to pay my mortgage when I lost my job because I was making videos for you.’ That’s a different feeling.”
Washenko explains there are two reasons why people should make content promoting Rosabella: “If you want to be the Tiger Woods of creator, if you want to be the Caitlin Clark, you want to be the Michael Phelps, you want the golden rings you want to be the greatest, to be the number one, that’s what we’re all about. That’s the Rosabella family,” he says. “Along the way, you’ll make a ton of money.”
Later in the video, Washenko stands on stage addressing a crowd, shouting out “all the people I’ve been talking to on Discord from day one, from 18 months, I started Rosabella in my mom’s basement.” He shouts out all the creators who he’s helped make rich and who helped make him rich. He then says there’s one other “person I want to shout out today.” He calls up Harry Chang, the YouTuber who made the video “How I print $51,000/month profit with AI influencers (feels illegal).” Washenko presents him with a Rolex. “I cannot be any more proud to be working on a brand with you,” and for that, I want to give you this watch today. It’s a Rolex, by the way.”
After 404 Media asked for comment on the video, it was deleted from YouTube.
DeMille, who reported the episode of Conspirituality diving into Rosabella, Washenko, and Chang, told me the men are “just actively bragging about it online. I can’t believe they’re openly talking about it like this.”
“A lot of the videos of these AI slopfluencers, they’re using narratives that real-life wellness influencers have seen success using, but they’re taking these narratives and inputting them into whatever AI systems they’re using and making people look whatever age they want,” DeMille said. “There’s no thought behind it. There’s no anything behind the content that they’re turning out. These videos they’re replicating in their AI machines are also being used to sell something, but it’s being generated into something else to sell something else. It’s this inception of bad information by people who don’t actually care.”
“These guys behind these AI slopfluencers have proven that they don’t care, and they obviously care more about money and wealth than they do about health,” she added.
Washenko did not respond to a request for comment. Ambrosia Brands did not respond to a request for comment.
A request sent to Rosabella was returned by someone named Emmanuel Obonga. The response said, “We don’t currently have an active affiliate program. However, we’d be glad to keep your information on file and reach out if we revisit or launch one in the future.” In the course of reporting an earlier story about the AI influencer company Doublespeed, Rosabella previously told 404 Media that it “does not use Doublespeed or any AI-generated accounts to promote our products on TikTok or any other platform. We are committed to authentic engagement and building genuine connections with our community. Regarding the claim about being viral on TikTok, this is based on organic content created by real customers and creators who love our product. We’ve seen a lot of positive buzz and user-generated videos that have helped spread the word naturally.”
Daniel Martens, a lawyer representing Humann, told 404 Media Rosabella’s strategy “makes [the] whole supplement industry look bad. If you’re masquerading as a doctor telling consumers how promising all these benefits that don’t exist [are], that’s harmful.